Cycling with cleats: Everything you need to know
Explaining the fundamentals of cycling with cleats and how to tailor them specifically to your needs
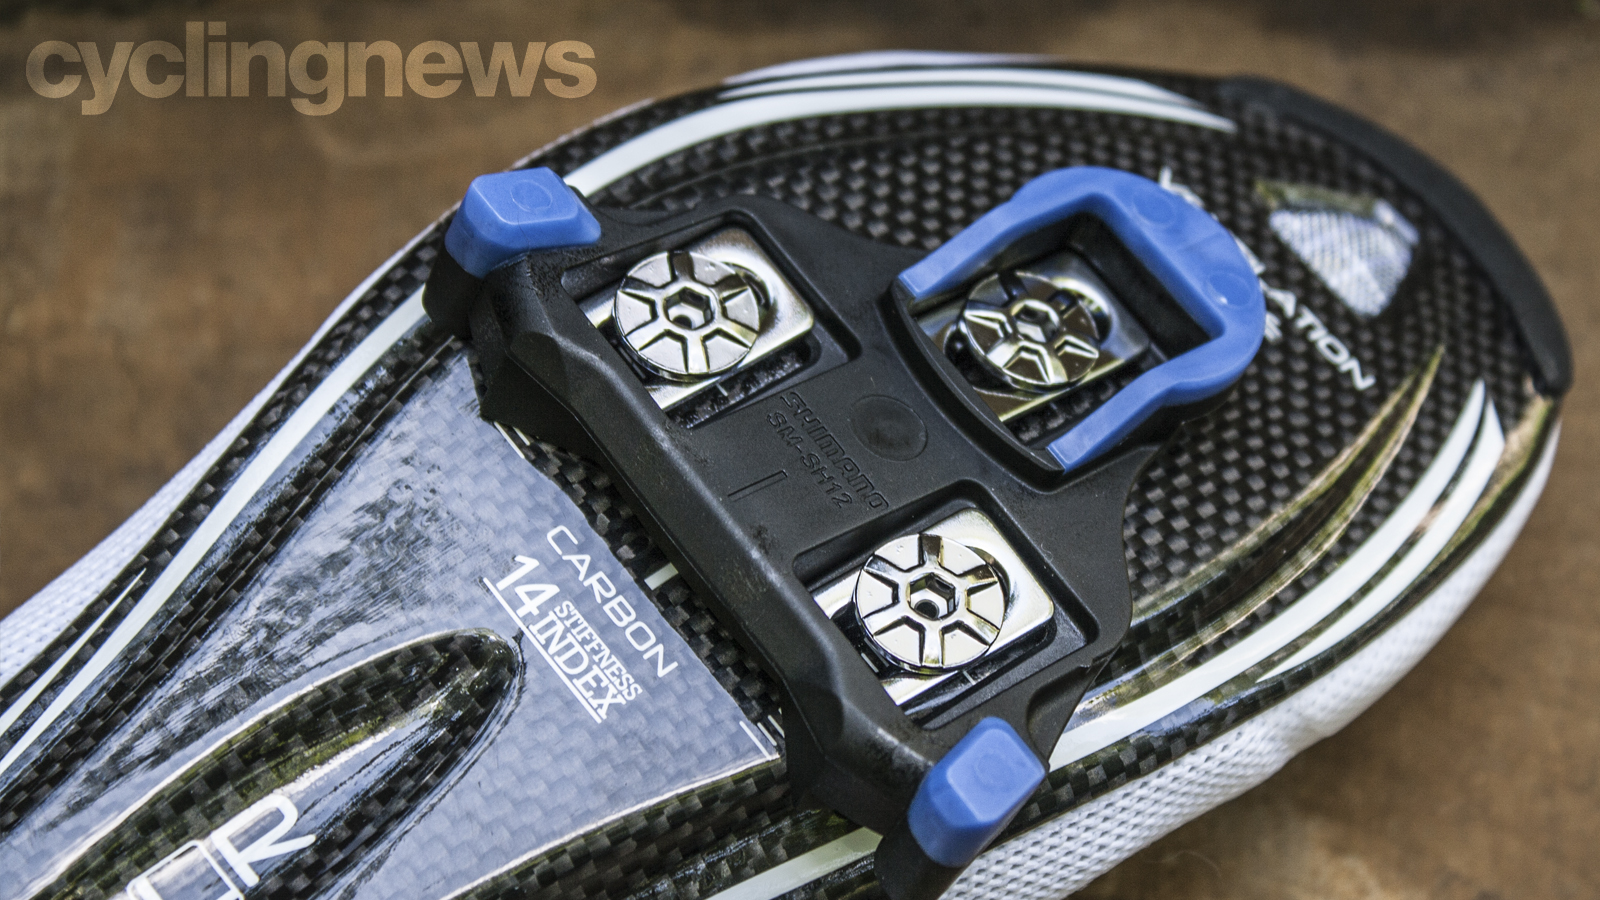
When we first start riding a bike, we ride with flat pedals, the typically plastic platforms that attach to the end of each crank arm, that we push on in order to ride. Flat pedals are perfect for beginners because you don’t have to think about them. You can put your foot in just about any position on top of the platform, so long as you have enough grip to push down and keep the wheel moving.
For keen cyclists, cleats and clipless pedals are the next step. These are pedals that use a cleat and pedal body that easily attach to one another, instead of just the floating feeling you get from riding on flat pedals.
There are a wide variety of clipless pedals and different cleats, that are built for different purposes, terrain, and type of rider, so the best road bike pedals very rarely crossover with the best gravel bike pedals, and the same can be said for shoes.
Note: clip-in pedals and clipless pedals are the same thing, as described above. Cleats are the part of a clipless pedal that attaches to the bottom of your cycling shoe – the cleats are what actually clips in to the clipless pedal. (The term “clipless” comes from the 1980s. When “clipless” pedals were first introduced, they referred to the lack of toe clips that had been used on pedals for decades.)
But first, let’s discuss why you should or shouldn’t use cleats.
Pros and cons of cycling with cleats
On flat pedals, your foot and therefore contact point with the pedal is in constant flux. Every bump, hill, or twinge can change your foot’s position on the pedal, which will affect your pedal stroke, your power output, riding position, knee angle, etc. Flat pedals are extremely inefficient because your foot is not actually attached to the pedal. Thus, you cannot pull up on the pedal, and the only way to keep the crank moving is to push it down. And the harder you push, the harder it is to keep your feet in the perfect position on flat pedals.
Clipless pedals create a direct and consistent connection between your foot and the pedal, which means you can push and pull on the pedal all the way through the pedal stroke. Cleats also keep your feet in a solid and consistent position, meaning that you won’t have to reposition your feet every few pedal strokes.
Get The Leadout Newsletter
The latest race content, interviews, features, reviews and expert buying guides, direct to your inbox!
Flat pedals affect your bike handling because you don’t have as good of a grip on the bike – on twisty descents or technical downhills, your feet could slip off of flat pedals if you’re not careful. Conversely, clipless pedals will keep your feet connected to the bike; but this isn’t always a good thing.
Cyclo-cross and mountain bike riders will know what a ‘dab’ or ‘tripod’ is. When riding through an especially wet, bumpy, or technical corner, riders will often unclip their inside leg in order to gain stability or to catch themselves in case their front wheel slips. It can be tricky to unclip your cleats mid-corner, especially if they are caked in dirt or mud. On the other hand, flat pedals will allow you to ‘tripod’ in the blink of an eye.
The faster you pedal and the more power you put out, the more important it is that you have cleats instead of flat pedals. It is incredibly difficult to keep your feet planted on flat pedals at over 80rpm, and it can be downright dangerous to try an all-out sprint. With cleats, you won’t need a second thought when spinning out on the rollers or sprinting for a town sign. Cleats will also help you up steep climbs, as you’ll be able to push and pull all the way around the pedal stroke, without wasting effort on steep gradients.
How cycling cleats work
Cleats work by interacting with a spring mechanism built into the pedal. With the cleat affixed to the bottom of your shoe, when you push the cleat onto the pedal, the mechanism clamps onto the cleat and holds it - and therefore your shoe - in place.
Using them is simple: Once you’re clipped in, you can push down on the pedal, pull on the upstroke, or even pedal backwards.
In order to unclip – to detach the cleat from the pedal – you simply push your heel to the side, away from the bike’s frame. So to unclip your left foot, you would twist your left heel to the left, and to unclip your right foot, you would twist your right heel to the right. Just about all clipless pedals work this way, so you won’t need to relearn every time you try out a new pair of cleats.
Remember that you will need to have a compatible cleat, shoe, and pedal set-up in order for everything to work. For example, an SPD cleat will fit an SPD-compatible pedal and a two-bolt compatible shoe; however, an SPD cleat will not fit a Speedplay pedal, or onto a three-bolt compatible shoe.
It can be tricky to get used to, and sometimes we just can’t unclip fast enough at a stoplight. We’ve all done it, but you’ll learn in no time, and after a few rides, clipping in/unclipping will feel completely natural.
Pro tip: Practice clipping in and out on your home trainer or while leaning against a wall. Do it slowly at first, and then fast, so you can get a feel for it before heading out on the open road.
Types of cycling cleats
Here are a number of common cleats that you will see at bike shops, group rides, and races everywhere.
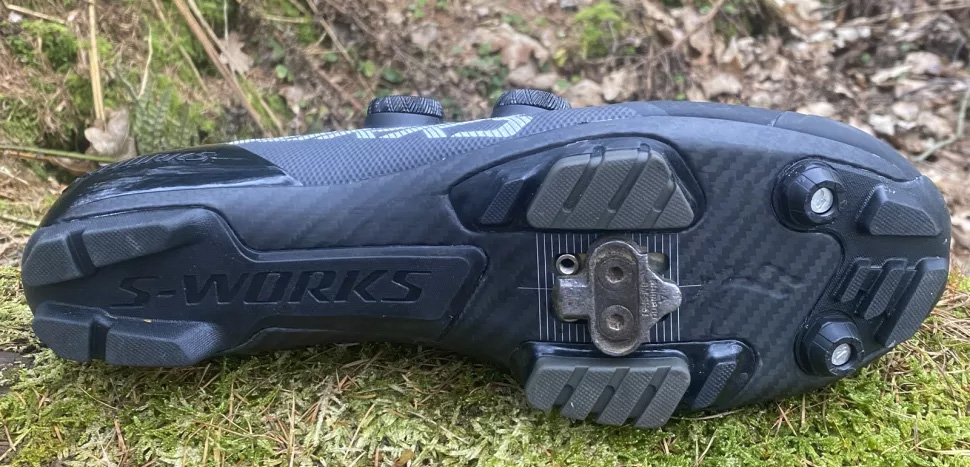
SPD (Shimano Pedalling Dynamics)
These two-bolt cleats are best for mountain bikers and all-terrain riding. The contact point is smaller on SPD cleats than comparable options, and so you’ll lose a bit of efficiency and power transfer. So why use these pedals? They are easier to clip into than traditional road pedals, for example, and they are very durable. They won’t mind a little scrape on the ground, or a chunk of mud getting stuck in the pedal body.
The two-bolt pattern makes SPD easy to use and simpler to adjust since there are fewer options for movement on the sole of your shoe. An added bonus is that the shoes and cleats compatible with SPD pedals are easier to walk in than SPD-SL, Look or Speedplay cleats. This is because they are recessed cleats, which is a cleat that is deep-set into the shoe, as opposed to those which stick out from the bottom of the sole. So if ever you frequent the coffee shop, local park, or even the grocery store in your cycling shoes, you should heavily consider SPD or recessed cleats.
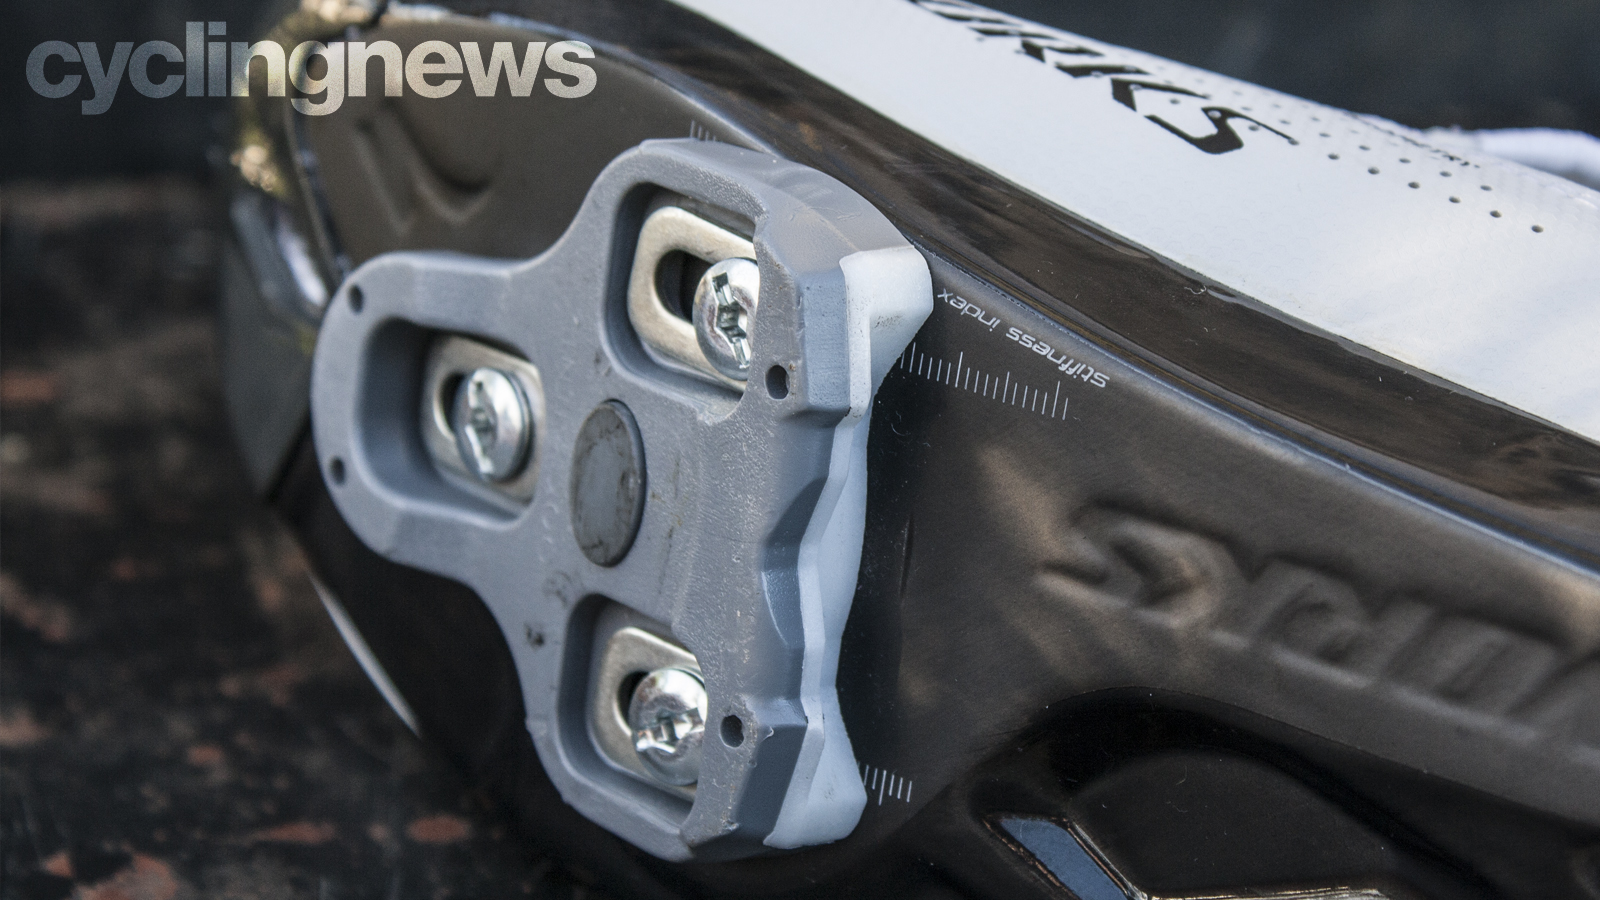
Look Keo
High-end road cycling shoe built for maximum power transfer. It’s no surprise that Look pedals are a popular choice amongst track cyclists, who routinely push over 1500w into their pedals. Look Keo cleats are strong and stable, you won’t lose much power transfer, but it won’t be super easy to clip out of either.
Made with classic three-bolt connectivity, Look Keo cleats have a wide contact platform and are compatible with almost any road shoe on the market. Look Keo cleats allow a degree of “float”, which is side-to-side movement when fully clipped in. The amount of float depends on the colour of cleat you choose, with either 0-, 4.5- or 9-degrees available. This isn’t a bad thing – in fact, many riders choose Look cleats because they are stable and secure, while simultaneously allowing a small degree of comfortable movement for your foot.
On the negative side, Look cleats can be slippery and difficult to walk in, so don’t plan on clomping around in them at the café. They are also stiff, and can be difficult to unclip from (although this can be adjusted). It can take some time getting used to stiff and performance-minded Look, so if you’re a commuter looking for your first set of cleats, there are bound to be better-fitting options.
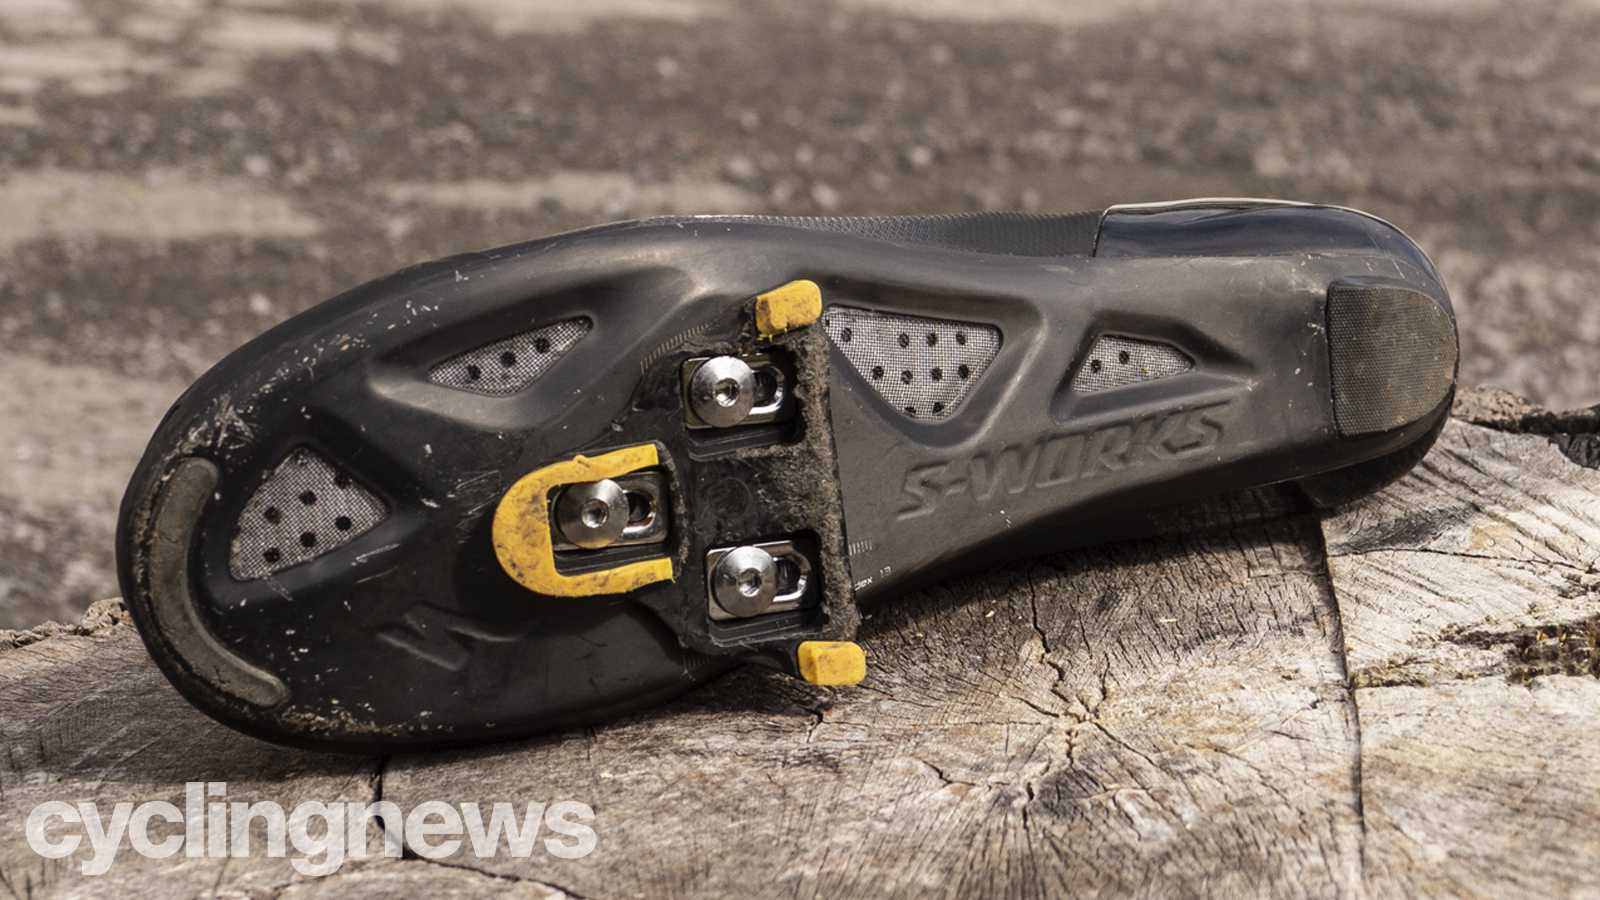
SPD-SL
Shimano’s three-bolt cleat and pedal combination is meant for cyclists wanting a wider platform and more pedal security. They actually look a lot like Look cleats. With a wide platform and secure power transfer, these cleats are best for efficient power transfer and a comfortable feel. Speaking of, SPD-SL cleats also offer an adjustable degree of float, just like Look cleats, but in a choice of 0-, 2- or 6-degrees. And just like Look cleats, they are not fun to walk in, and they are much stiffer than two-bolt SPD cleats.
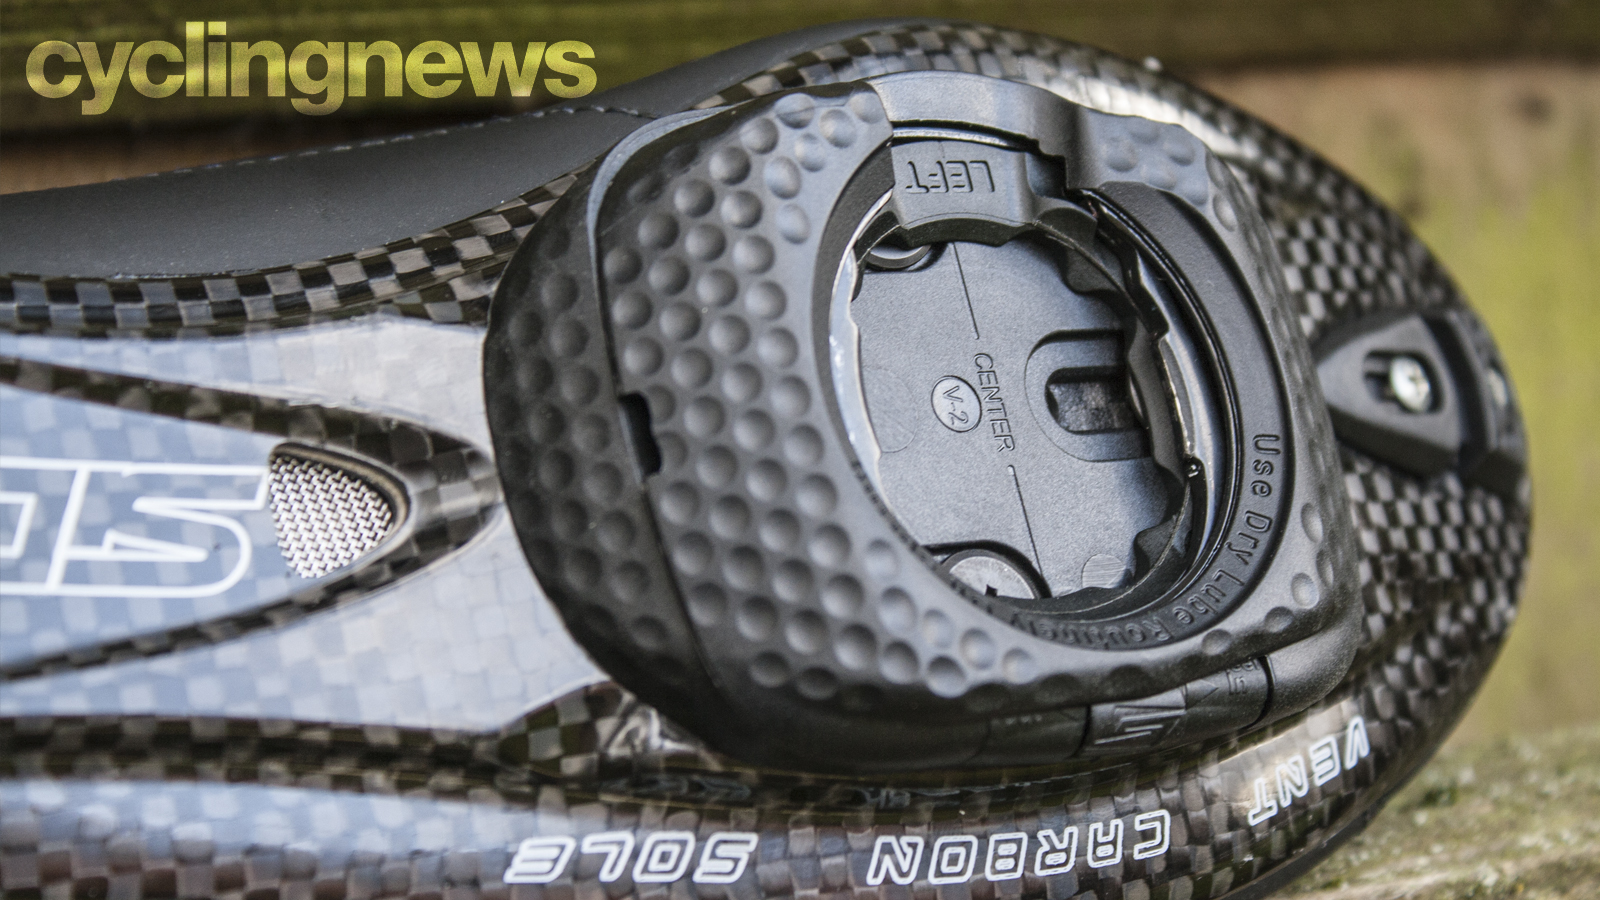
Wahoo Speedplay
Circular pedals that used to be one of the more popular cleat designs, Speedplays have been slowly falling out of style, but with Wahoo recently acquiring and relaunching the brand, they're back in the game.
Designed for road riding, you can find Speedplays in many different models, including the Aero version where the underside is covered in a dimpled aero design that looks like a golf ball. Speedplays offer the largest degree of float, compared to other cleat models, and instead of changing cleat entirely, the amount of float is adjustable between 0 and 15 degrees.
The pedals are especially functional because you can clip in on either side (other cleats are only compatible with one side of the pedal), as well as being highly adjustable. Speedplays are uniquely four-bolt, thanks to their circular design, but are still compatible with most road shoes that accept three-bolt cleats.

Crankbrothers
The ‘Eggbeater’ style cleat that is perfect for mountain biking and cyclo-cross due to its ability to shed mud. These cleats are known for being very easy to clip in and out from, which can be a good thing for beginners and a bad thing for those who like a secure hold, and their unique design creates a very low pedal tension. They aren’t the most secure or efficient pedals, but the ‘Eggbeater’ style is arguably the best for all-weather riding.
How to choose cycling cleats
When looking at a new set of cleats, you need to think about where you’ll be riding, and what your needs are when it comes to power transfer, pedalling efficiency, and float. Road riders should lean towards stronger, more secure three-bolt cleats such as Look or SPD-SL, while off-road riders and mountain bikers will find the two-bolt SPD cleats much more fitting.
Float is defined as the degree of rotational movement granted by the cleat while remaining fully clipped in. Think of it as how much you can wiggle your heel. Zero degrees of float has your foot locked at an exact position, and it can feel quite jarring to most people, especially those with knee problems. Four or five degrees of float is much more common, as this little bit of side-to-side movement will provide a more comfortable and sustainable pedal stroke, without putting extra strain on your knees.
Cleat tension is another important factor, defined as the amount of force it takes to clip into and unclip from the pedal. Shimano and Crankbrothers pedals come with adjustable tension. Look pedals do too, but the higher-spec 'Blade' pedals are much harder to adjust than others. Speedplay pedals aren't adjustable, but you can swap your cleat for an 'easy release' version.
If you’re commuting on city streets and stopping frequently, low cleat pressure will be your friend. On the other hand, elite racers with big sprints will want high cleat pressure so that they don’t accidentally unclip from their pedals.
How to set up cycling cleats
You’ve got your new cleats and your new pair of shoes, and you’re sitting at the workbench, ready to attach them. But where do they go?
The obvious answer here is the bottom of your shoe, but there are a few nuances to ensuring you get them in the correct position, and with two-bolt cleats, ensure you get them the correct way round. Fortunately, mounting cleats does not need to be complicated and all brands include a basic guide to fitment.
As for position, many, including myself, believe that best practice is mounting your cleats in the middle (both vertically and horizontally) of the ball of your foot, and adjusting from there. Common practice, as outlined in our bike fit guide, is to get the axle of the pedal directly beneath the ball of your foot. So to achieve this, here are a few ways you can test and adjust your cleat placement to simultaneously maximize comfort and power transfer.
There are five main ways you can adjust your cleats: fore and aft (closer to toe or heel), side-to-side, rotationally, float, and pedal tension.
Before you make any adjustments, remember that just because you’re adjusting one cleat doesn’t mean that you have to adjust the other. A lot of us have minor abnormalities, such as a leg length discrepancy, or rotated hips. Sometimes a unilateral adjustment is all you need because it will put you right back in alignment. A shim is a popular cleat adjustment, which involves placing a thin piece of material on one of your cleats, between the sole of the shoe and the cleat itself. This can add 0.1cm or 0.5cm of height to one side, which can help balance out any discrepancies.
Fore and aft and side-to-side adjustments mostly come down to personal preference and anatomical necessity. A bike fit is one of the best ways to ensure you get your cleat position right whilst maintaining suitable knee and hip angles.
As we’ve mentioned, a small degree of float is good for most cyclists as it allows your knee to bend and flex in a more natural and fluid way than straight up and down. Many cleat manufacturers will set limits on the degree of float allowed in their cleats, so make sure you read the fine print before making the final purchase. Look and Shimano even have colour-coded cleats to designate its degree of float.
As always, a professional bike fitter will be able to help with your cleat adjustment, as well as your overall riding position. Remember that your cleat position and height will affect your riding position, and especially your saddle height. New cleats can add 1-2cm of height onto the bottom of your foot, which will change your riding position if you don’t adjust your saddle height. So remember to tweak your riding position as a whole if and when you make any adjustments to your cleats.
Zach is a freelance writer, the head of ZNehr Coaching, and an elite-level rider in road, track, and e-racing. He writes about everything cycling-related, from buyer's guides to product reviews and feature articles to power analyses. After earning a Bachelor’s Degree in Exercise Science at Marian University-Indianapolis, Zach discovered a passion for writing that soon turned into a full-fledged career. In between articles, Zach spends his time working with endurance athletes of all abilities and ages at ZNehr Coaching. After entering the sport at age 17, Zach went on to have a wonderful road racing career that included winning the 2017 Collegiate National Time Trial Championships and a 9th place finish at the 2019 US Pro National Time Trial Championships. Nowadays, Zach spends most of his ride time indoors with NeXT eSport.