Bike fit: A comprehensive guide to a comfortable ride
Dial your position for comfort and speed with our bike fit guide
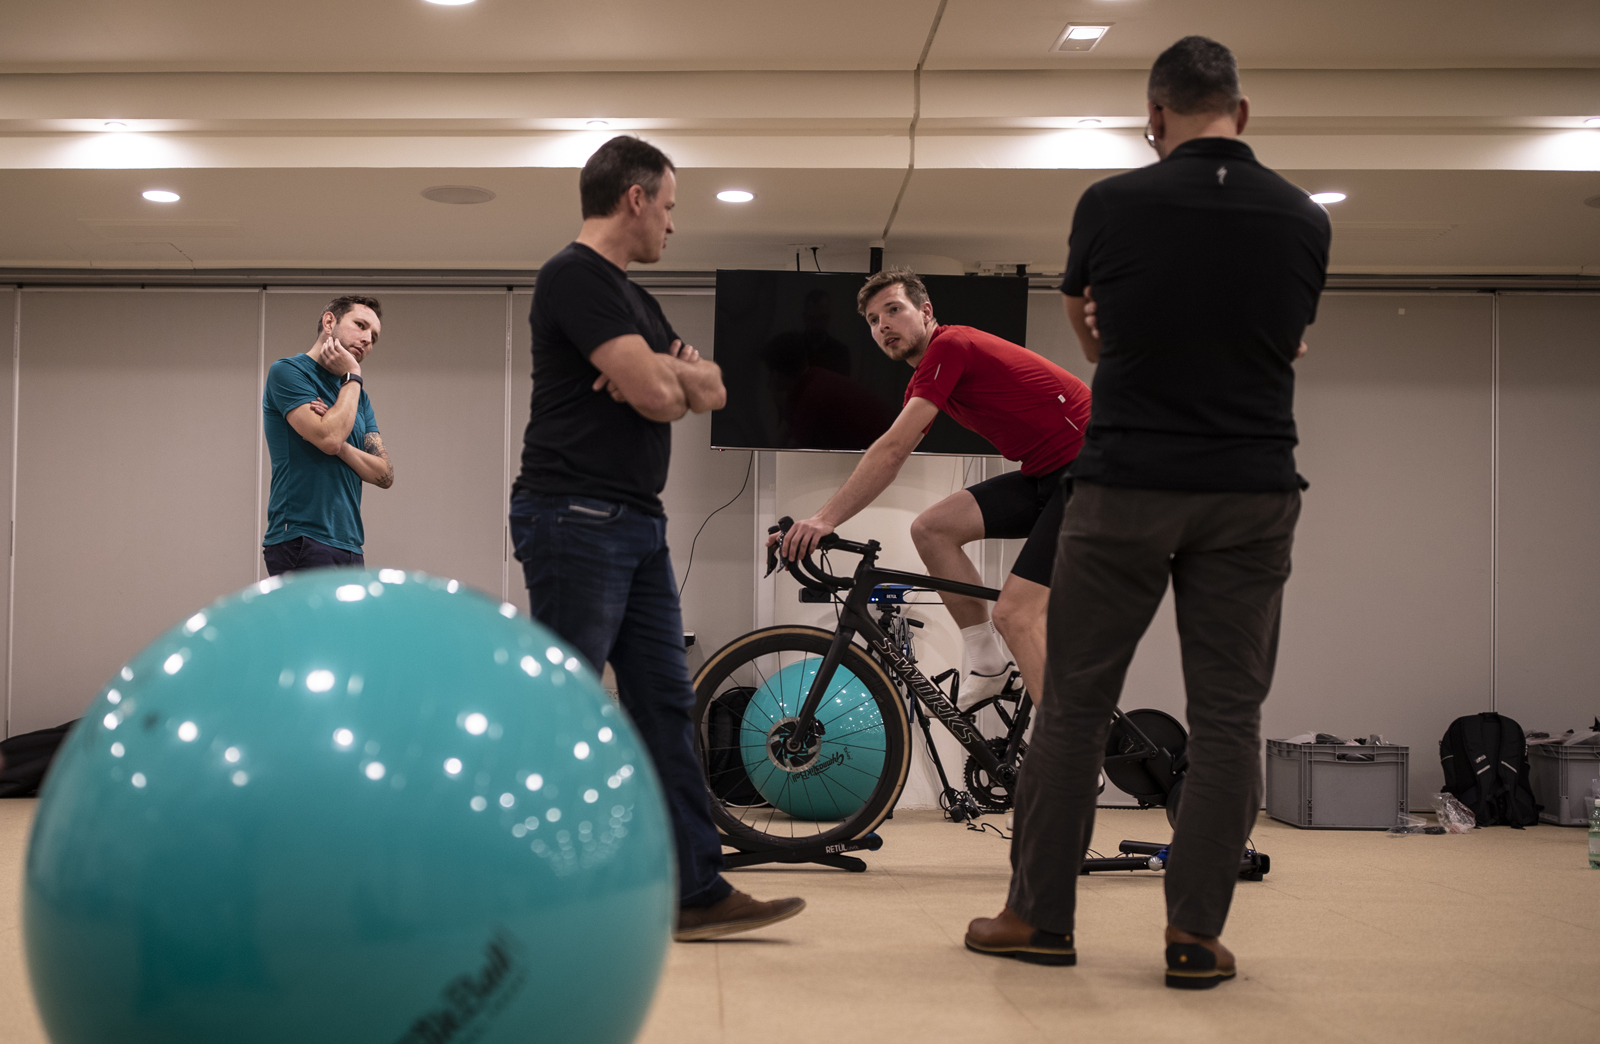
Cycling is a sport built upon repetitive movement, with extended periods of time spent in the same position, turning the pedals 90 revolutions per minute (rpm) for hours on end.
The term 'death by a thousand cuts' can ring true in relation to a bad bike fit. A misaligned knee or inturned ankle won't cause pain at first, but ride for two hours at 90rpm and you'll have performed over 10,000 revolutions of your pedals, and those small misalignments can quickly turn into major injuries.
No matter if you're brand new to cycling or an athlete training for a national championship, your bike fit is important. Riding a bike in the right size with your position perfected will likely be the difference between comfort and unwanted pain.
Bikes can be a pretty expensive investment, so you'll want to get the correct size right from the start. One of the most comprehensive ways to achieve this is to get a bike fit from a professional.
However, before you do, this bike fit guide will take you through choosing the right-sized bike. That's not all though: bikes are inherently adjustable, so we'll also walk you through the free adjustments available on a bike, and the components you can replace to fine-tune your bike's fit.
Bike fit research before you buy
We've already covered bike sizing in-depth with our article, what size bike do I need, but here are the key takeaways.
If you're brand new to cycling and starting from scratch with regard to your bike fit, most bike manufacturers will have a size guide that will associate your height with an appropriate bike size. However, just like how you might be a size 9 in Nike shoes and size 9.5 in Adidas, there's very little standardisation in bike sizing and it can differ greatly across brands, so just because you ride a 56cm frame in Specialized, don't just assume you'll ride a 56 in Trek. This is an essential first step to putting you in the right ballpark.
Get The Leadout Newsletter
The latest race content, interviews, features, reviews and expert buying guides, direct to your inbox!
However, these guides rarely take into account the discrepancies between leg and torso length, so two people of the same height might not necessarily fit on the same size bike. For this reason, bike manufacturers also create a geometry chart for their bikes, explaining the in-depth measurements and angles of each frame size. The problem here is that, to many, these geometry charts are a confusing jumble of meaningless numbers.
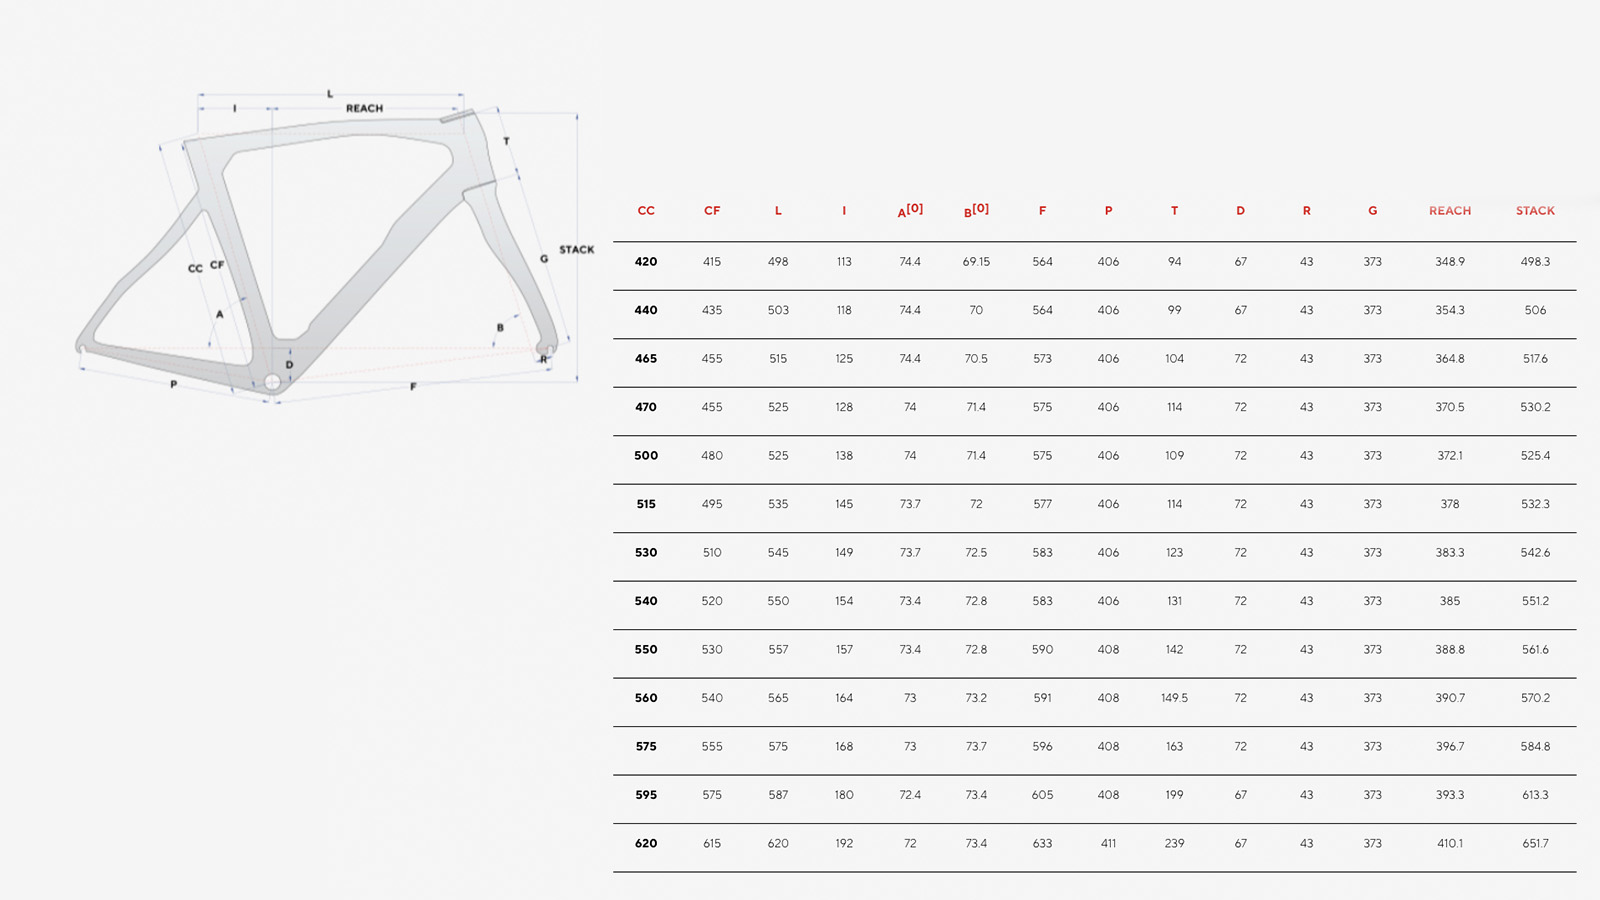
Firstly, like most things, reading a bike fit geometry chart is easy when you know how.
All geometry charts are in table format, like above. On one axis, they list the available sizes for the bike in question, and on the other axis, a variety of key points of measurement. The rest of the cells are the measurements themselves; some are lengths (usually measured in millimetres), others are angles (measured in degrees).
All geometry charts list the same key points of measurement, such as the 'stack', the 'reach', or the 'top tube length' and more, and therefore, it's possible to compare apples with apples when trying to compare Trek with Specialized.
There's no single measurement that will ensure the perfect bike size for your specific body's dimensions in all brands, but we can help demystify the basic bike geometry measurements to help you understand what they mean, and how they affect your bike fit. What's more, if you're replacing a bike, you can compare the new bike's geometry to your current bike to find the one that most closely matches.
Here are the key measurements to compare.
Stack & reach
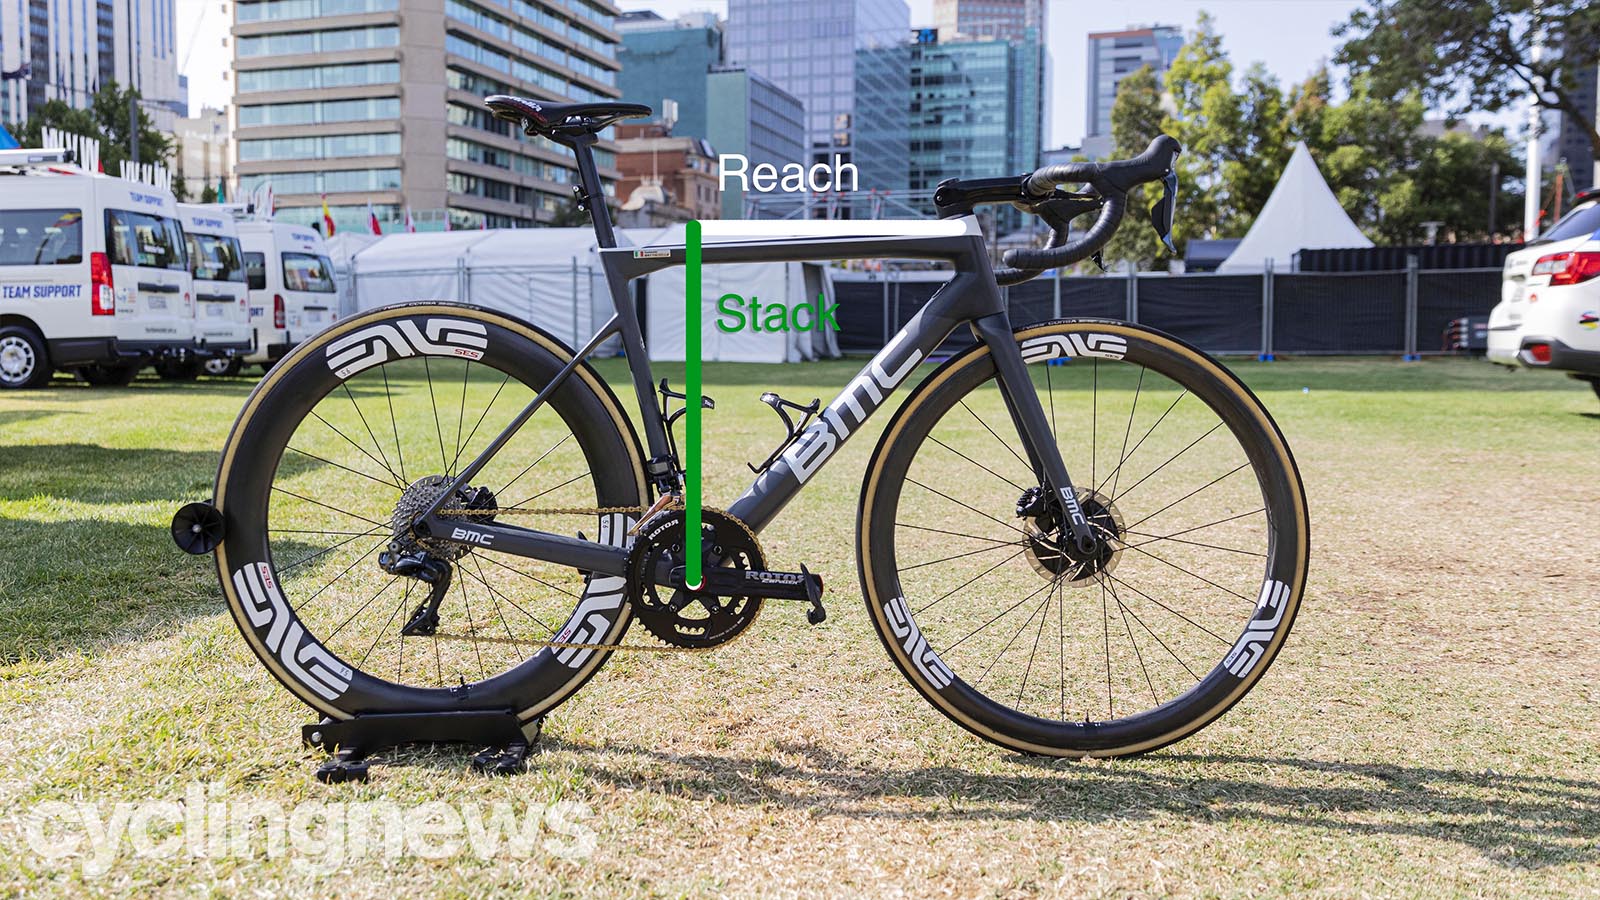
These two measurements quantify the vertical and horizontal distances between the bottom bracket and the top of the head tube, respectively.
As explained in the image above, if you were to draw an imaginary line vertically from the centre of the bottom bracket, and then another line horizontally from the top of the head tube, these lines will eventually meet. Measuring the length of each imaginary line will give you the stack and reach - luckily you don't need to actually do this, as bike manufacturers have done it for you.
No matter the bike size quoted by a manufacturer, the stack and reach numbers are a constant and comparable way to measure bikes across different brands. So if your current Trek bike has a stack of 400mm, that's what you need to look for on your new bike.
Top tube length & effective top tube length
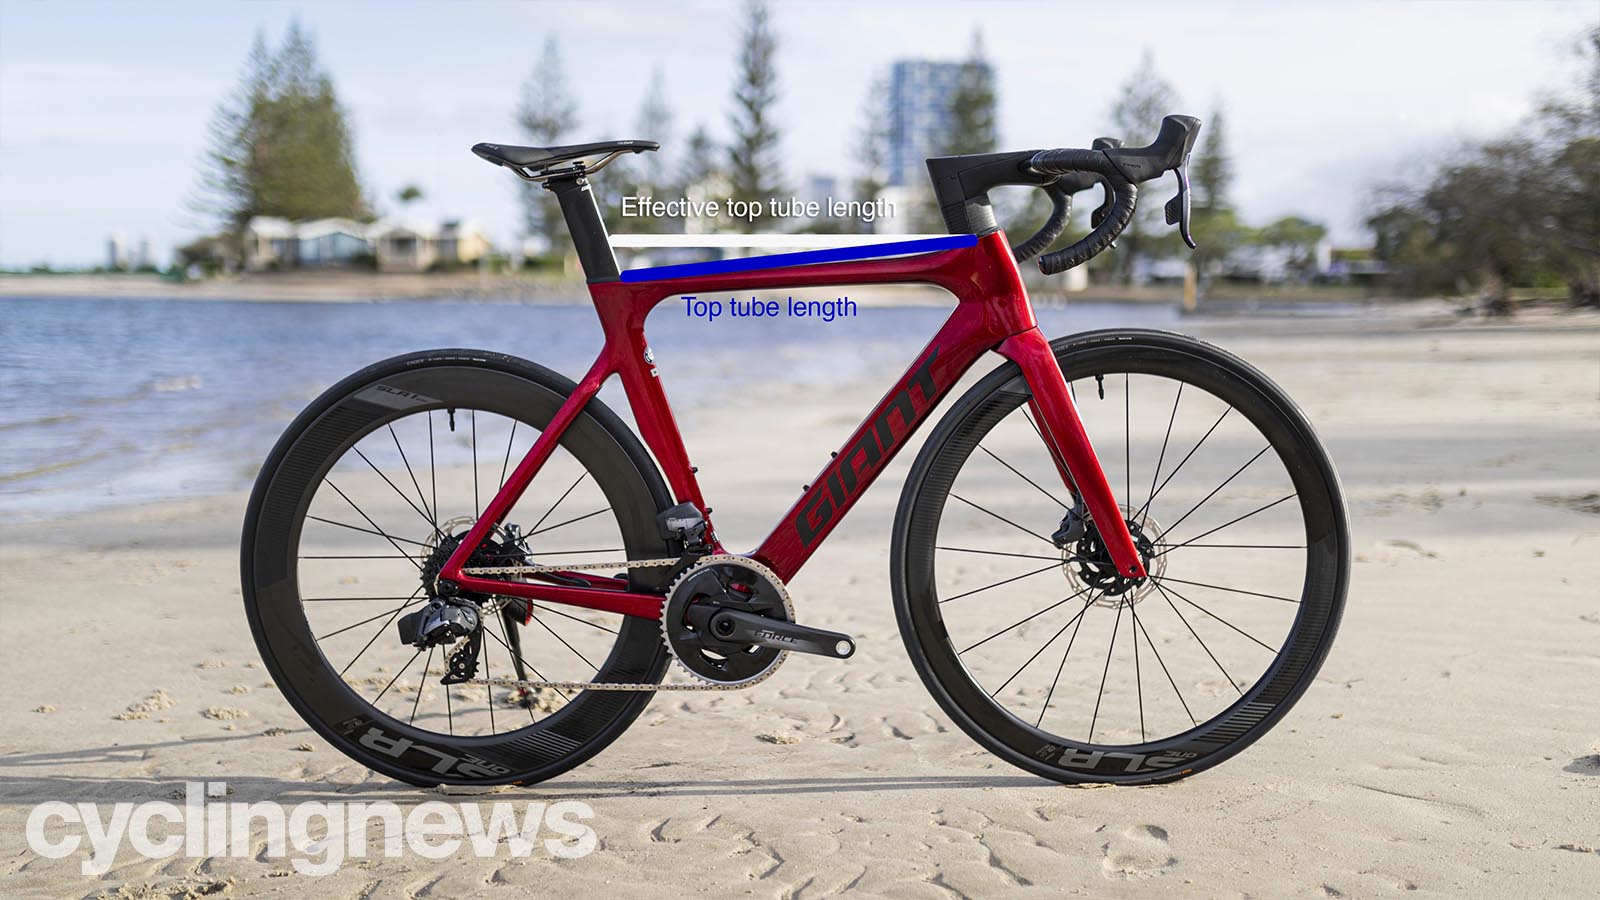
Bikes are typically sized in one of two ways. S, M, L etc like t-shirts, or in a numerical figure in centimetres. This figure is usually a measurement of the top tube length, however, with the angled top tubes of bikes nowadays, top tube length is no longer a sure-fire way to compare bike sizing, and so 'effective top tube' was created.
As per the image above, this is what the length of the top tube would be, were it parallel to the ground. It gives another good clue to the bike's reach, while taking into account the angle of the seat tube.
Maximum saddle height
The other thing to consider, especially for the longer-legged among us, is the maximum saddle height available.
If you're short in the torso, opting for a bike size based on reach alone might leave you maxing out the permissible amount of seatpost. Many bike brands will quote the maximum seat height, so compare this to your inseam - or ideally your current bike's seat height.
This won't always be included on geometry charts, but it will be available on the brand's website or by contacting the brand directly.
Free adjustments
Even once you've bought the correct size bike, there will be adjustments you need to make in order to get the correct bike fit. Here's a rundown of all the free adjustments available on a typical bike.
Saddle height
One of the most obvious adjustments on a bike is the saddle height, and it's imperative that you get it right to avoid pain. Our guide on how to set your saddle height has the lowdown on getting it right.
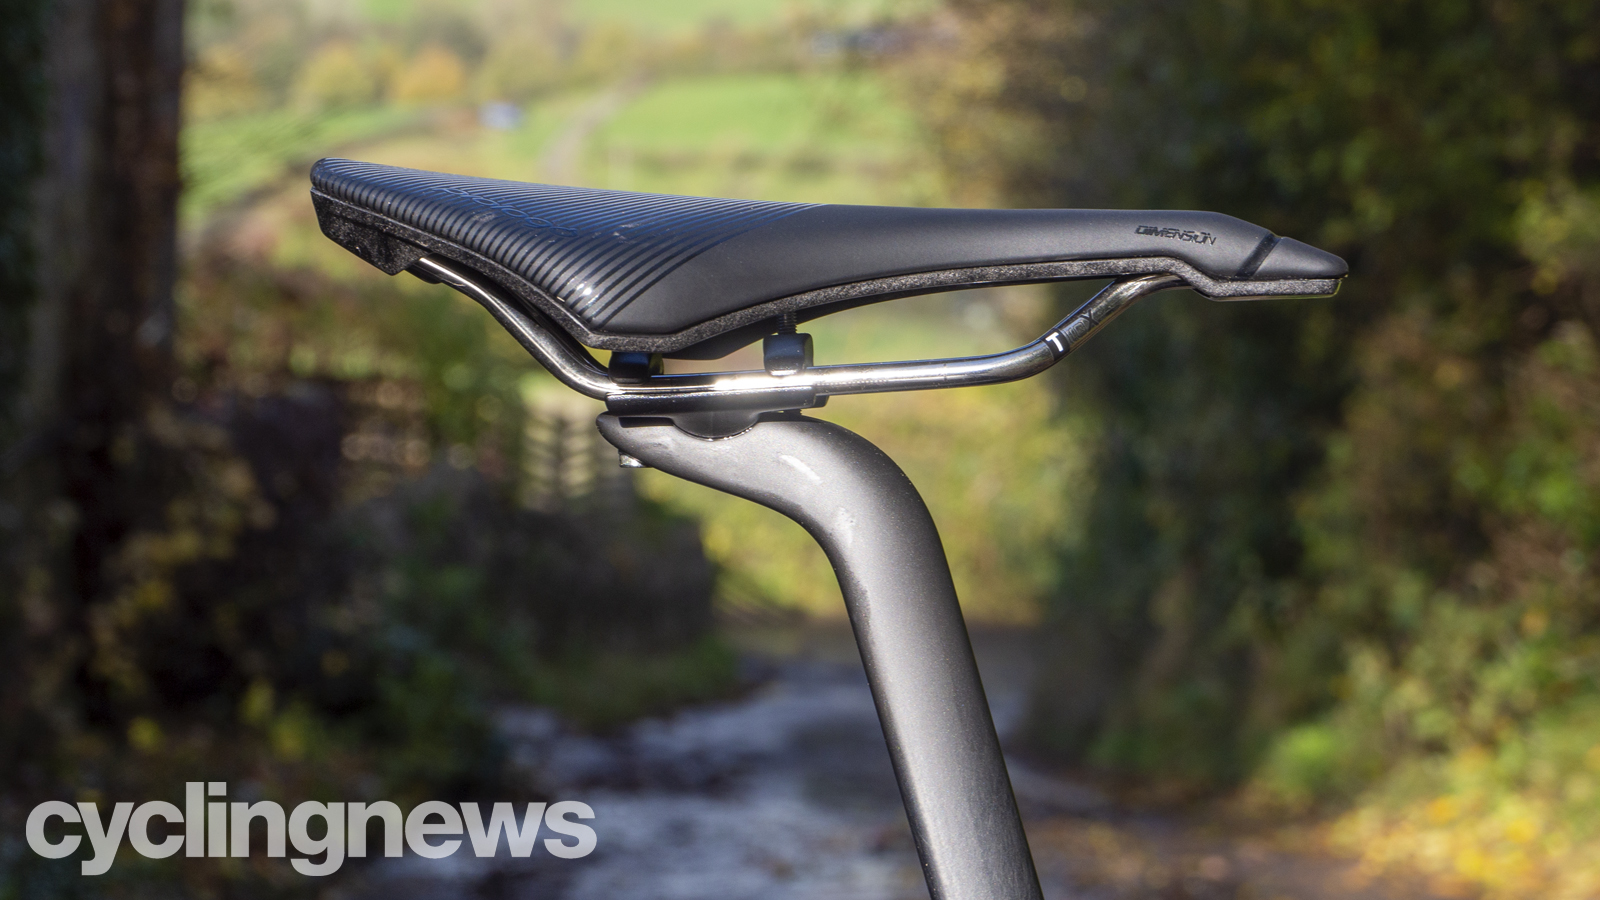
Saddle fore, aft & tilt
A lesser-used adjustment at the saddle is its position on the rails and its angle. These rails usually offer around 5cm of fore and aft movement, allowing you to position yourself more directly over the pedals, or further back as required.
A major consideration for road cyclists is to get the correct position of the knee relative to the pedal spindle in order to generate power throughout the stroke. KOPS (knee over pedal spindle) is a term used to find the correct fore/aft. With your foot on the pedal and the crank at the three o'clock position, hang a plumb line (some string with a weight at the bottom) from above. The line should pass through the kneecap and pedal spindle.
The saddle tilt is more of a personal preference around comfort. Start by using a spirit level to get it parallel to the ground, and make finite adjustments from there as comfort dictates.
Cleat position
If riding clipped in, then your cleat position is another source of available adjustment. Depending on your brand of cleats and model of cycling shoes, the amount of adjustment will vary, but there will always be some degree of fore and aft, as well as left and right.
In terms the fore/aft position, your aim is to get the spindle positioned beneath the ball of your foot. To do this, start by wearing your cycling shoes and search for the bony protrusions on either side of each foot - these are your first and fifth metatarsals - and mark them on your shoes. Next, remove your shoes, and fit the cleat, aligning it so that the centre of the cleat lines up with these two markings.
As for left and right, The aim here is to find a position that allows your knees to track perfectly vertically, and you are adjusting so that your pedalling position matches your stance width - the distance between your hips. If you max out the adjustment here and want to go wider, it is possible to get pedals with wider spindles.
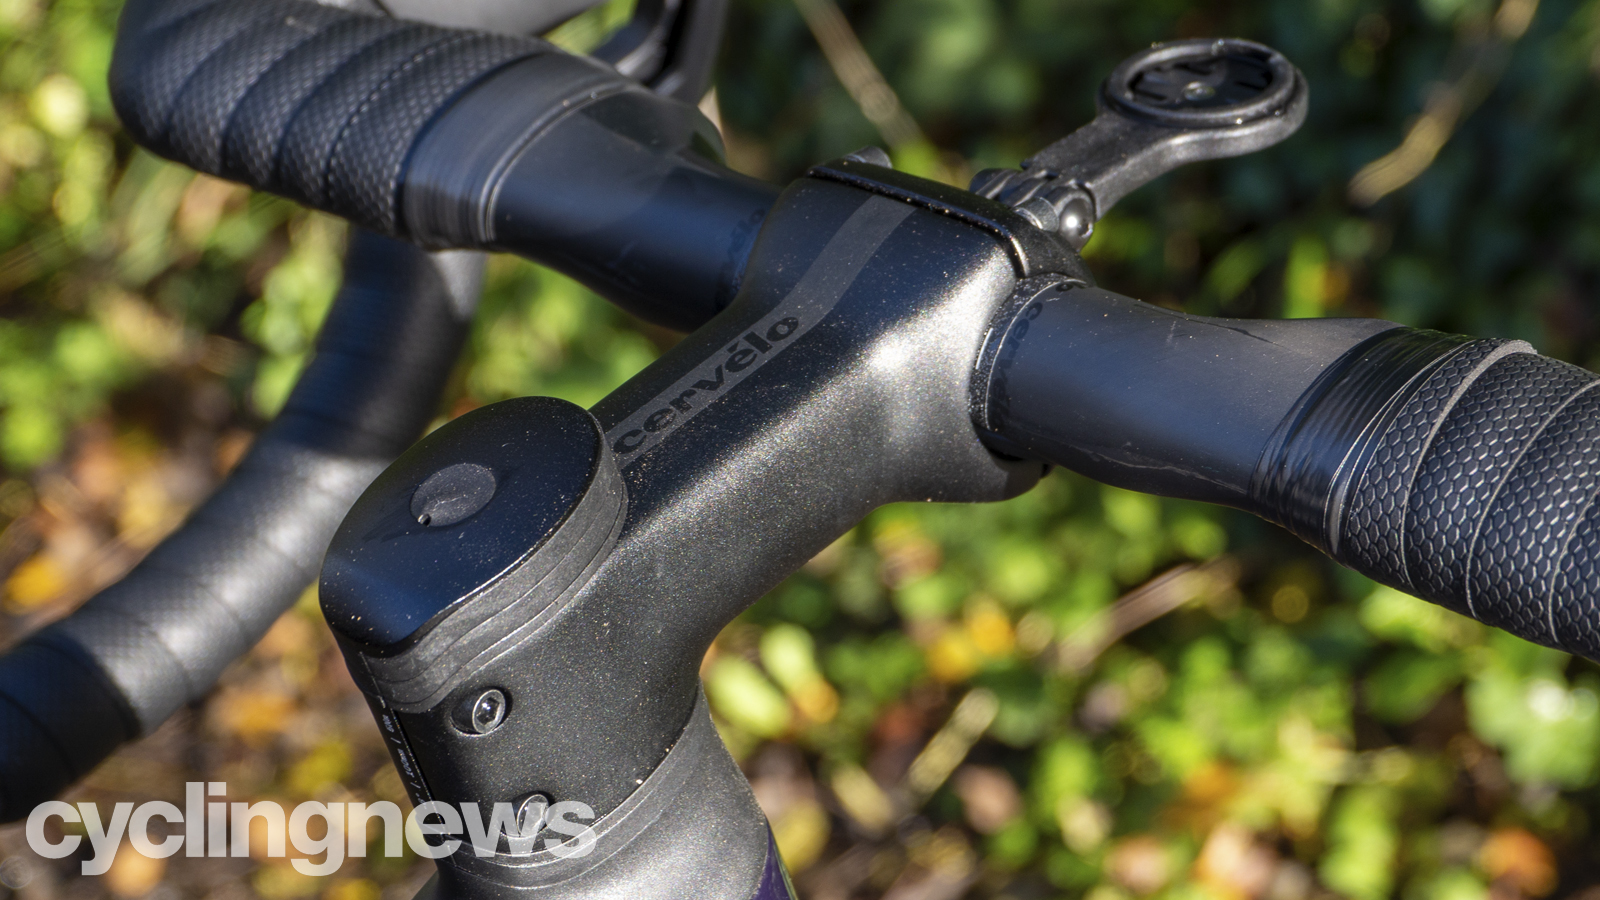
Headset spacers
On a new bike, there will typically be spacers fitted beneath the stem. You can interchange the position of these spacers with the stem. This usually offers around 3cm of vertical adjustment at the cockpit, in turn, raising or lowering the position of your handlebars.
If you're new to cycling, you can play around with this to find one that's comfortable. You shouldn't be putting too much weight through your hands, and the ideal position will have a soft bend - around 10 degrees - at your elbows. If you feel lower back pain after riding, it could be that your handlebars are too low, so try moving them up.
If you're comparing an old bike with a new one, you can use the stack measurements, work out the difference and offset it with the correct number of spacers.
Handlebar angle & hood angle
For road and gravel bikes - and to a lesser degree, mountain bikes - tilting the handlebar and the hoods will also affect their position. With road bikes, hoods should ideally be positioned so that the hand position is level with the ground, however, a few mm in either direction can aid comfort. Some will even tilt them inwards at an angle to adjust the effective width of the bars, however, we'd advise swapping out the bars for a narrower option.
Upgrades you can make for a perfect bike fit
If you've maxed out any of your bike's available adjustments and want to continue tinkering with your bike fit, then there are various aftermarket upgrades available in different sizes, lengths and angles. Upgrading your bike doesn't always have to be about making it lighter or fancier in order to go faster, many upgrades will simply improve the comfort of your bike, and a bike that's more comfortable will undoubtedly mean you can go faster or further, but most importantly, it'll probably be more fun to ride.
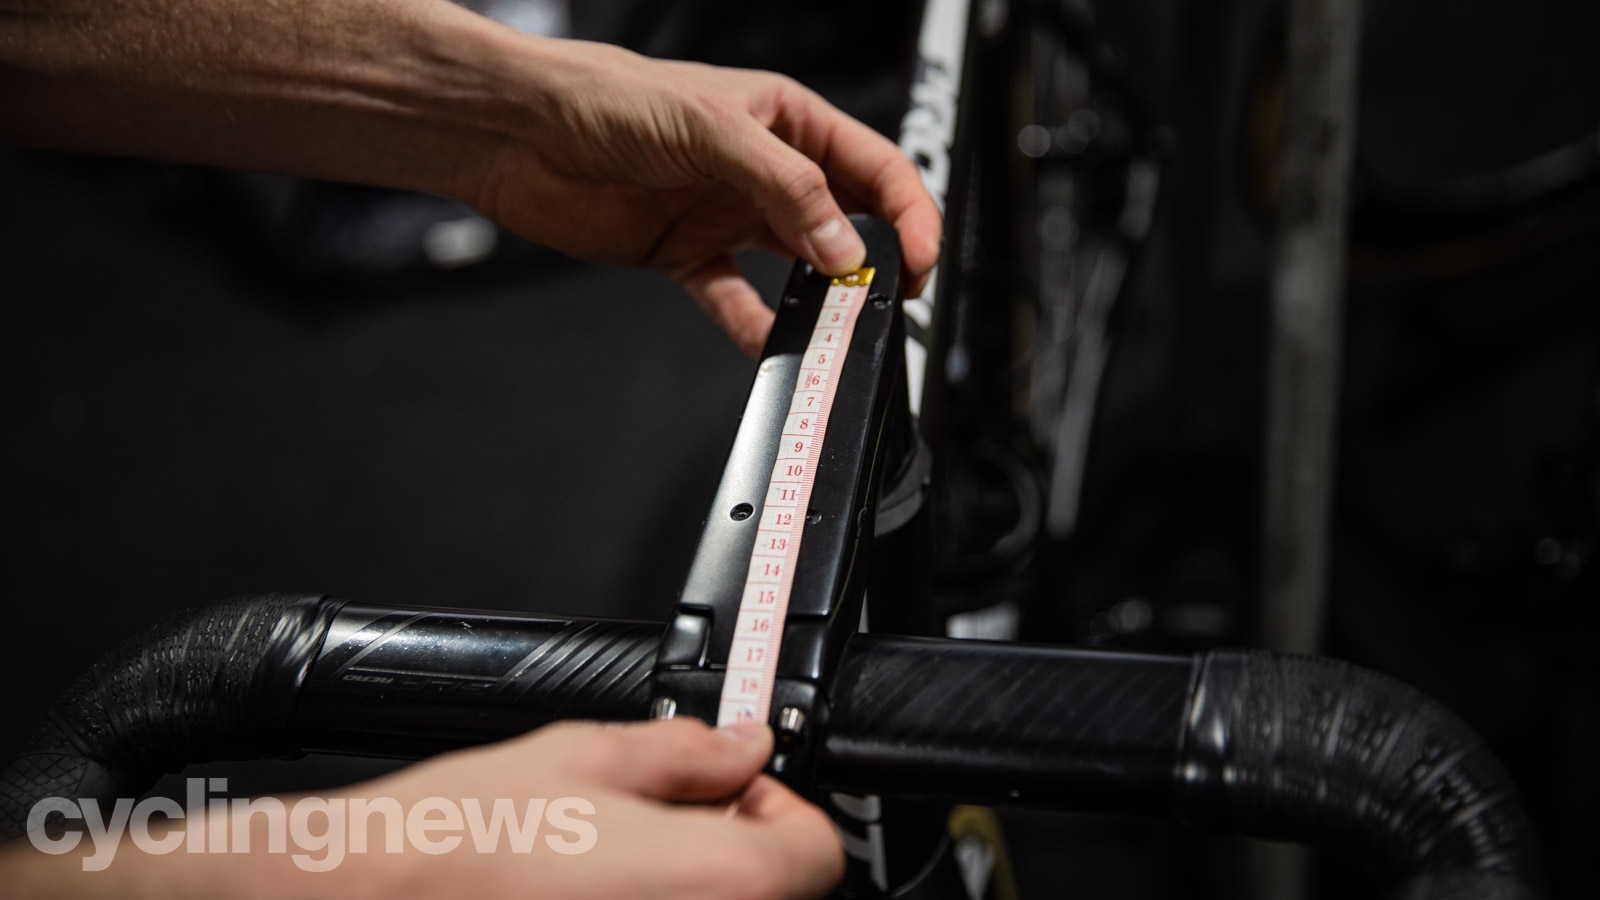
Change your stem length and angle
One of the first things people consider when tailoring their own bike fit is the stem length. Assuming you're not using an integrated one-piece cockpit, then changing the stem length is a straightforward solution to fine-tune the reach of your bike. Typically available in 5mm or 10mm increments - depending on the brand - stems range from around 30mm long in mountain biking to 150mm at the extremes of road cycling.
Stems are also angled, usually anywhere between 0 and minus 17 degrees (though higher angles do exist). Most can be 'flipped', meaning they can be positioned at a positive angle, which will effectively move the position of the handlebar up. If you feel shoulder or neck pain after a ride, it’s possible that your stem is too long or too low and you're overworking the muscles in your neck to keep your head up.
Change your handlebar width, reach and drop
The best road handlebars and gravel bike handlebars come with multiple dimensions for measurement, and thus, multiple areas of consideration when choosing the right size. Width is the most obvious, but reach, drop, back sweep and flare also play a part.
Road handlebars are typically available in 2cm increments from 36cm up to 44cm wide. Gravel pushes this to around 50cm, and mountain bikes further still. For road cyclists, the best way to choose the ideal bar width is to measure the distance between your shoulder joints and find bars of a similar width.
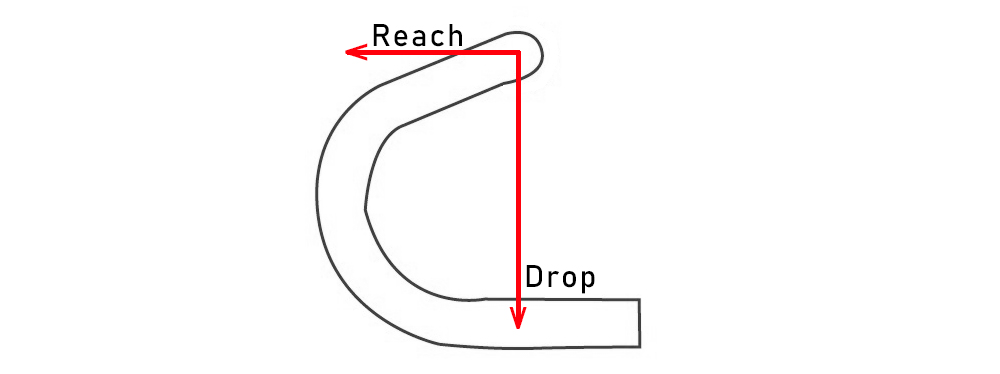
Reach is an important consideration when changing to a different model of handlebar, because they can differ by upwards of 1cm, meaning you may need to accompany your bar swap with a new stem to account for the difference. Drop, flare and backsweep are of secondary importance to bike fit, but are still worth considering when buying.
Change your saddle size
The difference between an ill-fitting saddle and a comfortable one can be like night and day. A badly fitting saddle will undoubtedly cause discomfort in the immediate area, but it will likely also create a chain reaction of compensation as your body looks to stabilise itself in other ways.

The best road bike saddles are typically measured by their width, which is measured in millimetres. In order to choose the correct width, you'll need to know the distance between your sit bones - the two bones in your bum that will support your weight whilst sitting on a saddle. Many bike shops will have a tool to help you measure this, which usually consists of a dense memory foam pad or an electronic pressure sensor; after sitting on the pad, the area of maximum indent will show the position of your sit bones, and with this, you can measure the distance between the two. To replicate this at home, you can use a piece of corrugated cardboard.
Take this measurement, and find a saddle width that most closely matches, sizing up rather than down.
Adjust your crank length
There are a lot of reasons for changing crank length. Some focus on the difference in leverage that comes as a result, but it can be a solution to many bike fit concerns.
By shortening the crank length, your feet will track through a smaller circle when pedalling. This means the bend in the knee and the hips is reduced at the top of the pedal stroke, and the extension of the knee is reduced at the bottom of the stroke. It means you can more easily achieve the 'knee over pedal spindle' requirement, and therefore push your saddle further back, which in turn will open the knee angle further.
However, be aware when changing your crank length to adjust the saddle height by the same difference.
- Road bike groupsets: A complete overview of today's best groupsets, no matter your budget
Don't ignore warning signs
No matter how perfect you think your bike fit is, or how small the changes you make are, if it's not right, the chances are your body will find a way to tell you, so if you're suffering any acute pain as a result of cycling, it's likely because something isn't right with your bike fit.
Continue testing, learning and adjusting your position until you get it right, and be aware that over time, your body will change and your perfect position will change with it.

Josh is Associate Editor of Cyclingnews – leading our content on the best bikes, kit and the latest breaking tech stories from the pro peloton. He has been with us since the summer of 2019 and throughout that time he's covered everything from buyer's guides and deals to the latest tech news and reviews.
On the bike, Josh has been riding and racing for over 15 years. He started out racing cross country in his teens back when 26-inch wheels and triple chainsets were still mainstream, but he found favour in road racing in his early 20s, racing at a local and national level for Somerset-based Team Tor 2000. These days he rides indoors for convenience and fitness, and outdoors for fun on road, gravel, 'cross and cross-country bikes, the latter usually with his two dogs in tow.